Sunday, 22 March 2020

Welcome Back


I haven't been on the blog for about a year. So what have I been doing. I finished the Design for Embroidery course from the Embroidery Association of Canada. I got my work published in Embroidery Canada Magazine. At home my garden has gotten a lot bigger and I have been doing renovations in the front room. Creating a better place to embroider and use the computer.

Final Project Beginners Crewel Embroidery Halloween Theme
This is the final project from the Beginners Crewel Embroidery Course. It was in the spring edition of Embroidery Canada 2019. I haven't put a picture of it on the blog before this. The design was made in the fall using a Halloween theme. It shows off a variety of stitches and techniques I learned during the course.
These are some pictures of the pieces that I made during the Design for Embroidery Course.

Quilted pink eyelet lace


The first one is a small quilted sampler using a piece of eyelet lace sewn between two pieces thin material.
Texture sample green squaresTexture sample with stitch names


Next is a sampler of textured stitches the names of the stitches have been added.

Positive and Negative Space Sampler

The last piece is a sampler from the lesson on positive and negative space. While taking the course I enjoyed reading a lot of interesting books about embroidery, art and design.

Over the winter I've been sorting through and organizing my supplies. It's a small space and I'm trying to figure out what will fit in the front. The weather is warming up now and I'll be able to continue with the renovations over the summer. I've got a few more projects on the go now that I will be sharing on here soon.

Friday, 12 April 2019

Paisley Circle

Embroidered Paisley Finished
Here is another piece that I completed for the design course. The point was to design a colour scheme and then use it in a piece of embroidery. This circle is 8 inches I thought about making the circle smaller the design seemed to be a bit too crowded then. I think it needs some decoration around the edge not just a blanket stitch. It doesn't really look like it's finished yet.

I did the darker green outline first to put an edge around the area to be filled in. Then I could follow the line around when doing the border. The outline and the center are filled with long and short stitch. As I worked in each line of stitches I drew the curl on top of the threads.

Filling in the paisleyGreen Outline for PaisleyIn the original drawing I had a scalloped edge. A scalloped edge that size would take a long time to sew if I tried to fill them in. Instead I used the Portuguese knotted stem stitch. The round knots make a bumpy edge and it works up really quick. Being a knotted stitch it uses much more thread by the end I used two skeins of the purple thread.

The flower petals are done in padded satin stitch. The center of the flower is edged in stem stitch with french knots inside. It worked better to sew in the petals and add the center afterwards. I tried it both ways and the one where I did the center first didn't look as nice. All the curls were done in stem stitch with french knots for the small dots inside. The large dots are done in the padded satin stitch.

Thursday, 14 March 2019

Embroidered Brooch


Blue Brooch Embroidery
This started off as an experiment to see how whipped running stitch would look as a filling stitch. In the rectangle it gave the design a woven look. These pieces looked best when viewed from a few feet away so the colours blend together. When viewed up close the running stitch base stands out more. I made the brooch as an after thought and finished it is 1’’ by 1 3/4’’.
I worked the running stitches for the whole rectangle first because I wanted to get the rows of stitches to line up. For the top three rectangles I used blue running stitches. In the bottom one I used the rainbow variegated thread to see which would look more like a bright sunset.
Running Stitch base

The whipping was done afterwards. I used the same blue as the background for the top. I used variegated threads for the rest. When I was done I took a look at the four pieces together. I was most interested in the blue variegated rectangle. I thought it was a nice scene and would be a good size for a brooch.
Whipped running stitch rectangles
To make the brooch I had to cut the pieces up to cut out the rectangle but decided that it was worth it. I snipped the corners off to reduce bulk and cut out a cardboard and a felt rectangle the same size as the embroidery. The fabric is strung over the cardboard as described in my post Goldwork Ornament and a brooch pin is attached on the back.
Brooch BackBrooch Construction
Whipped Running Stitch base for sunI made the sun at the end after trying out the rectangles. I wanted to see how it would work filling in another shape since running stitch curves around so nicely. I worked from the outside in and started a new row each round rather than making a swirl.  I used yellow for the running stitch base and a variegated yellow-orange thread for whipping over top.
Embroidered Sun


Tuesday, 26 February 2019

Window View Corrections


Window View with Corrections

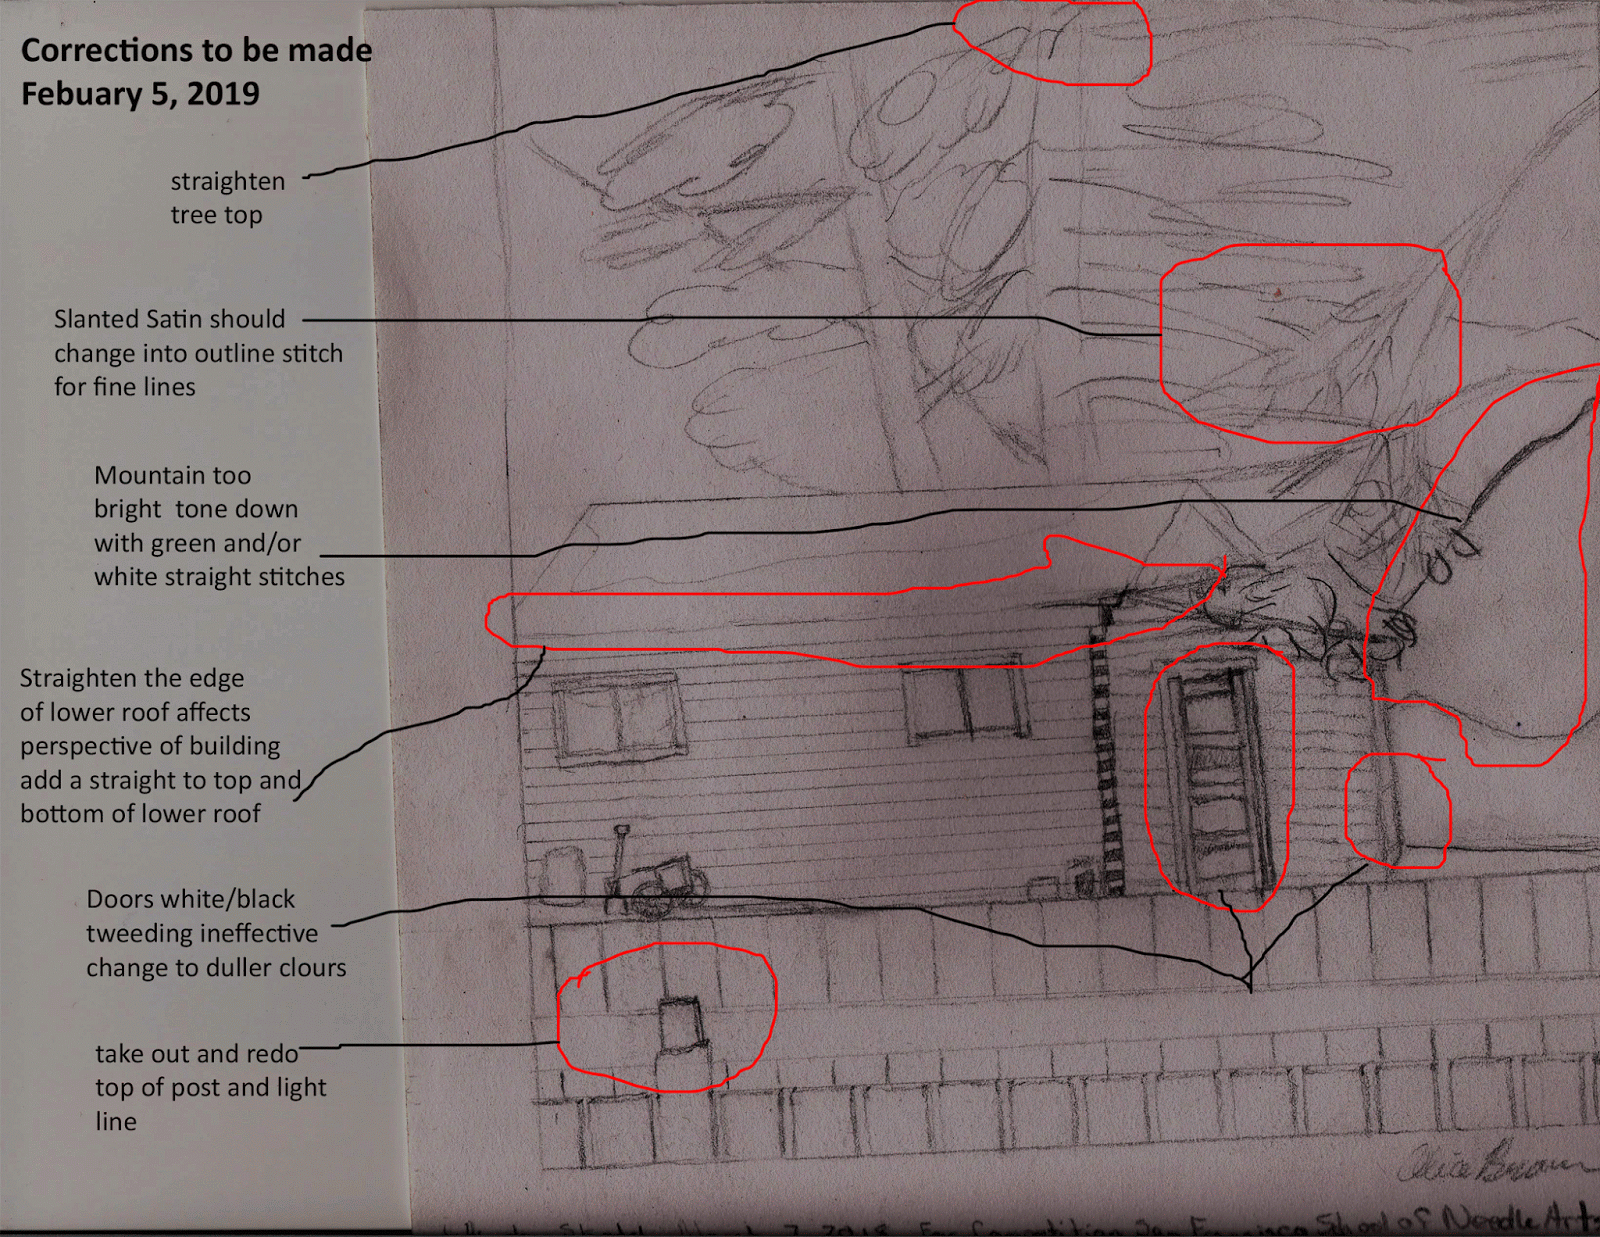
I have finished all the tree stems and all the large branches that need to be completed before the rest of background. I’ve gotten to the point where some problems are starting to show up. The building, the tree tops and the fence post all look a little crooked. The door and the hill stick out too much. I can see a few little fixes I could easily make. I'm not sure which one is affecting the piece the most. 

Map of Problem Areas
 I went back and looked at the scan of the drawing I made the pattern from. I circled all the areas of the picture that stuck out and made a few notes on how I could improve the look. I went through and made the changes shown below. Overall it did make the design look a lot better.
door removed
original door
Door new fillingThe most obvious thing that did not fit in well was the door. I removed the stitching from the door so that it could be completely redone. I filled the door back in using the same colors as the fence post and the shovel handle. The door still sticks out a little more than I wanted it to but looks better than before.
Hill with green stitching
Plain yellow hill
The yellow ochre hill is way to bright. First I tried to tone it down with white thinking it would look like patches of snow. That made the hill look even brighter. Using the same green as the trash can I made straight stitches on the hill. These look like trees growing on the hill. This toned it down a bit and added some texture instead of being a large block of color. 
fence post close upfence post corrections

The light brown fence post looks a little crooked. The light colors on top of the post don't blend in. I took these light lines out. Widened the post at the top and finished it off so the stitching at the top was straight.

Roof edge correction
Roof edge close up
The fix that changed the piece the most was straightening the edge of the lower roof. Even though it was just a few stitches and was the fastest of the changes to make. It is near the focal point and the vanishing point of the picture. This little fix changed the perspective of the whole building. 

Tree top removed
Tree top slanted
Tree top correctionThe right tree was not straight at the top. It was slanted at the top making it look like it stopped just before the top edge. It would be even harder to keep the top straight with a crooked tree top. 
I have the piece almost finished now and will write one more post showing the final piece. 

Wednesday, 6 February 2019

Window View 2 Fences and Walls

Adding Color to the Fence and Wall
This is the second post about this piece. In the first post I got the piece started up to where the black outlines were done. Today I will continue on filling in the foreground. Starting with the fences and moving back to fill in the side of the house. Both fences and the house are filled in by blending two colours of threads together. This is also referred to as tweeding. 

Brown FenceFence Shading
The brown fence was done in a satin stitch. Blending the colours gives the fence a multi-coloured look. The brown fence is filled in with satin stitch through the spaces between boards the grey fence showed. I used a darker grey here and the same grey along the bottom of the horizontal board. I used a split stitch to fill in the horizontal board to make it stand out from the boards behind it. The colours didn't blend quite as nicely in the grey fence as the brown fence.

Fence close upGrey Fence
Door and Window Frames
Next, I filled in the tools and details on the wall. It made the wall easier to fill in with the edges clearly defined. The edges are mostly outlined with split stitch. The finer lines are done with straight stitch. I used a stem stitch for the garbage can to give it a rounded appearance. 
Coloring the Wall
The building was the most fun to fill in. I used many different shades of brown blended together. Switching back and forth between one pair and another making the side of the building many combinations of colours.

In the next post I will be filling in the roof and starting on the trees and branches surrounding the building.

Saturday, 19 January 2019

Italian Corded Quilting

Italian Corded Quilting Octagon Design
 This piece is done in Italian corded quilting. A decorative form of quilting commonly used to for Celtic knot work. Two pieces of cloth are quilted together and a raised design is made by threading cords between the lines of quilting. I sewed this piece for the design for embroidery course that I am taking from the Embroidery Association of Canada. The piece measures 6 inches from one side to the other. It is made with natural linen cloth for the front and white cotton for the back. The quilting was done with DMC flower thread and candle wicking cotton used for the cording. I was a little disappointed how plain the piece looked when I was finished with it.  I still think that it would make a nice hot pad in the kitchen.
Hand drawn patternOctagon Design Traced

This type of work is sewed on the backside so the pattern is copied on the back piece of fabric. In this design it makes no difference but the design will be reversed on the front side.  I tried to copy the pattern using my water-soluble pen. It finally ran out of ink after having it forever. I use it so often. I need to replace it as soon as possible. I settled for a pencil to draw the picture on the piece of cloth. This is not a good practice especially with such light color fabric and thread. The color can rub off on the thread most of it washes out easily afterwards. 

BastingQuilting outer edge


quilting trianglesQuilting center


The two pieces of cloth are basted together to hold them in place while the stitching is done. Running stitch is sewn along all the lines. It’s important to make sure the line stay as straight as possible and an even width apart so that the cord fits evenly.  The pictures above show the order that I quilted the lines in. The picture below is the finished quilting.


Finished quilting

Below shows the candle wicking cotton being threaded between the two lines of quilting. I started with 6 strands which barely showed on the surface and kept increasing them until I was using 10 strands. It is important when turning the corners to leave a little extra thread to keep the corners from losing their shape. The finished piece is shown at the top.


Threading in the cord


Tuesday, 4 December 2018

House Out The Window


Beginning of embroidery house out the window
Pencil Sketch of the house to be embroidered
Summer got very busy this year building gardens and getting set up in my new location. I have some time to get back to work now and would like to start by getting this one finished. I'm done more than I'll show you today but I have taken pictures all the way along so there will be more to come later.

I started this piece in the spring inspired by the view from my window challenge put on by the San Francisco School of Needlework At first I didn't even really think I had much of a view out my window just some walls and fences. When I took a closer look at what was over the fence I could see an old style house back under the trees with old tools lined up along the edge of it. With a little less fence and some more of the trees and sky it did make a nice subject for a landscape scene.

I took a bunch of pictures first then made a sketch based on the pictures. I scanned the sketch onto the computer to crop and size. Then darkened all the lines for a print out that could be traced on a light board. I have had better success this way. I've tried tracing pictures off the computer monitor but ran into a few problems with the work sliding around too much.  A tablet makes it much easier than a laptop or desktop computer. The work can be held around the back with masking tape and it can be moved around to a better position for drawing. I've found it useful sometimes for small simple designs that can be traced quickly. Designs that take longer to copy can get in the way of using the computer for anything else until the tracing is done. Depending how long it takes this can get very annoying.

Selection of colors to be used in the embroidery

I selected a range of colors for the picture. I will not be using all of these. I wanted to narrow my choices and still have extra colors to choose from. Some may look a bit different when I try them in the embroidery. 


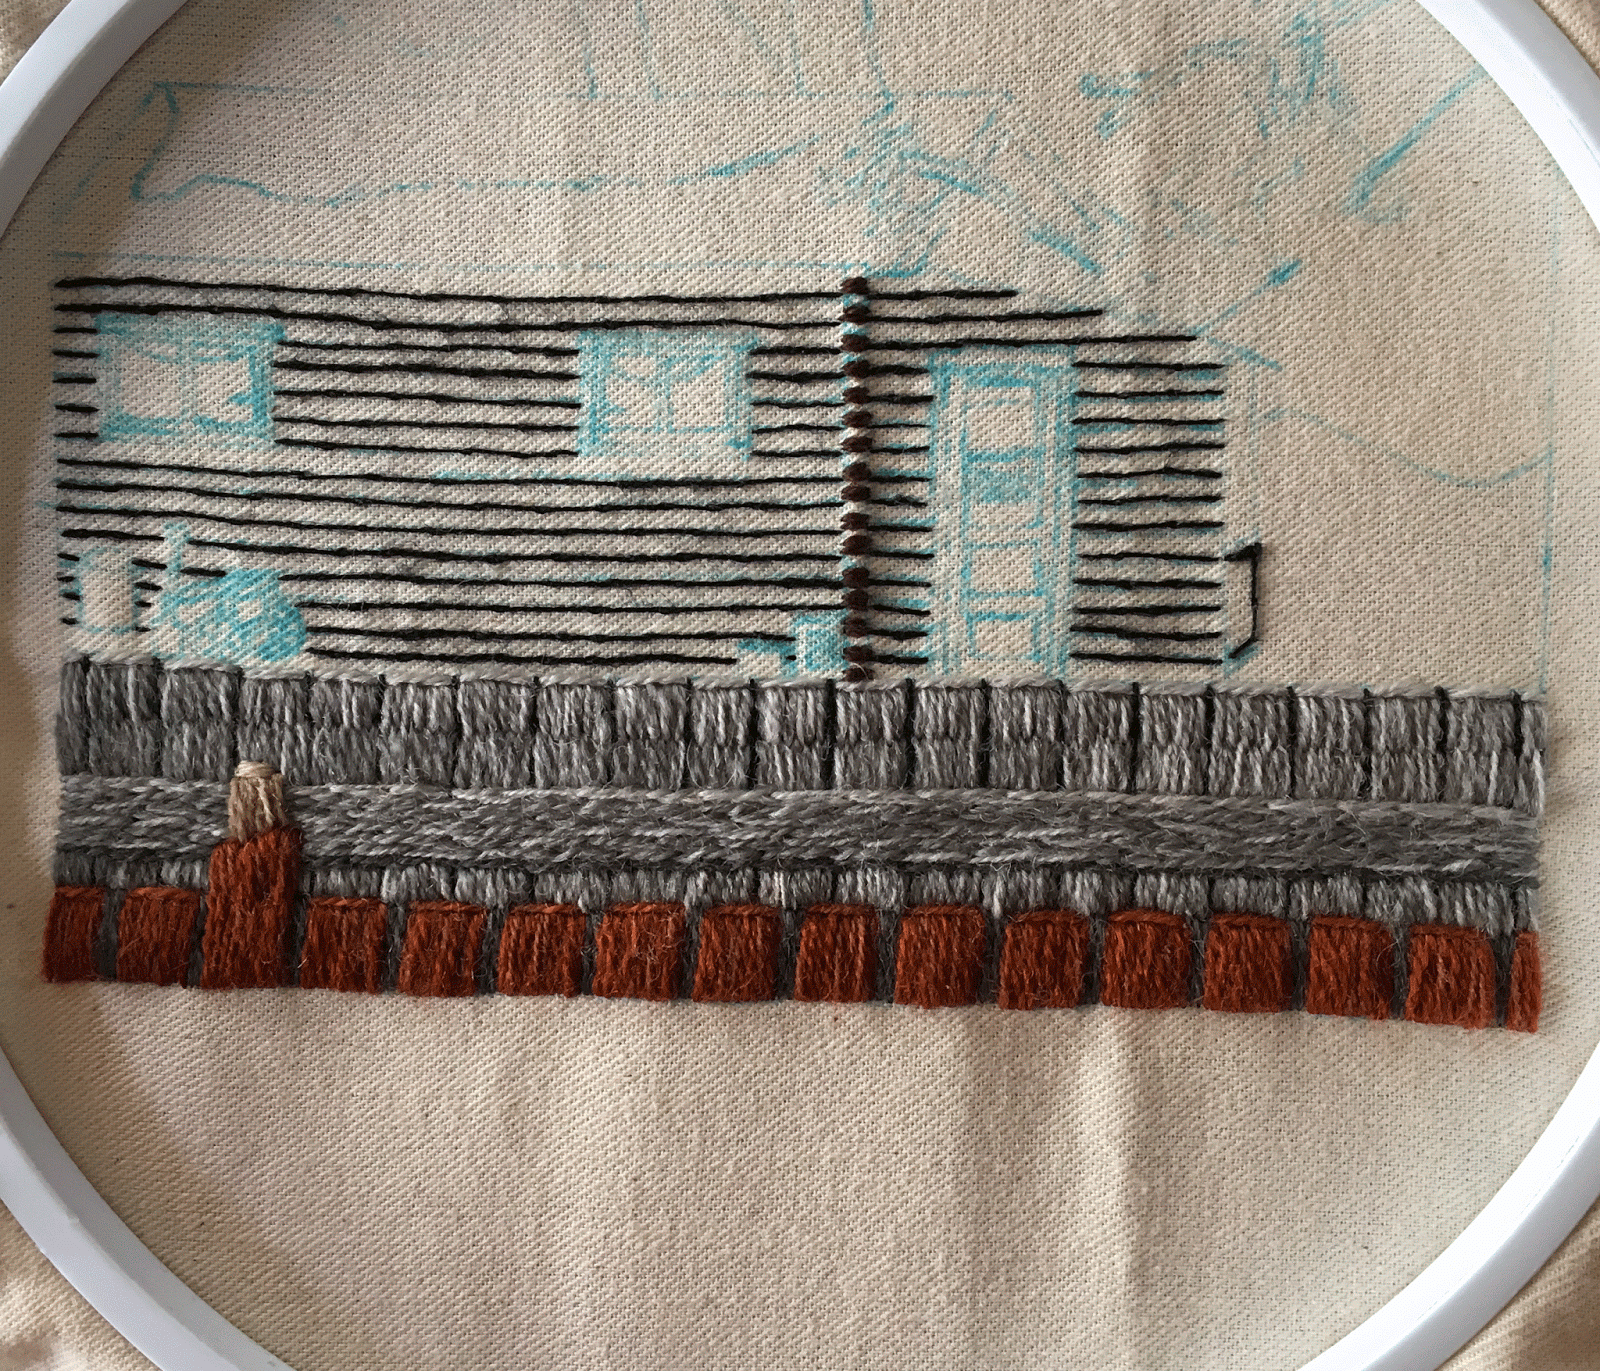
I started with the black lines first using a split stitch. Many of the lines went almost straight across the piece making good base lines to work from and outlining some large areas making them easy to fill in. I am not going to outline the whole picture in black it would get messy once I got to the trees. The black lines are spaces between the boards that appear black in the picture.

I moved on to adding color with an outline around the brown fence. This outlined will make the top and sides of the boards stand out when the fence is filled in.