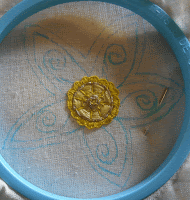
I adapted a picture of a stylized flower that I found online. I sketched one out then traced it on to the fabric with a water soluble marker pen. I had to adapt the picture a little more as I went along.
I started in the center with a small satin stitch circle. I used the brightest orange color that I had picked out. Next I outlined it with the metallic thread. I couched the metallic thread on with the bright orange thread. I went around the center three times.
I did the next round in Satin Stitch. After looking at a book about Chinese embroidery I decided to divide the center into pie shapes and fill in each one.
I built the design up more by making small loops around the center with the open chain stitch in the orange color. It helps to add several layers of stitches to thicken the piece so it will hold it's shape later when pinned on. Then I put a straight stitch in orange between each piece of the pie shape. This covered up the seam left between the pieces. I put another row of couched gold thread around the edge.
I went around the center one more time with a row of buttonhole scallops. These are what really made it look like a daffodil. I made these in the same bright yellow color that I used on the edge. The petals were done after in long slanting stitches in a lighter yellow color.
I couched down swirls made with the metallic thread. While I was couching the lines down I held the swirls in place with the needle. These held down the Slanting Satin Stitches since they are so long. They also help hold the petals out and when it's finished can be used to bend and shape them a little.
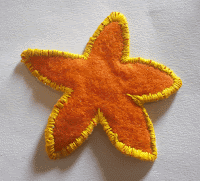
At this point I pinned the embroidery to a piece of felt so that the edging would hold the two layers together. I carefully cut out the flower a little bit at a time before working the edges. I stayed a little ways ahead of myself so I had room to move the needle from one side to the other.
I did the edging in a buttonhole stitch so that the top line of the stitch made an outline for the Satin Stitches and wrapped all the way around the edge. I cut off pieces while going around as they got in the way. The felt back was nicely edged and I added a brass pin afterwards.


No comments:
Post a Comment