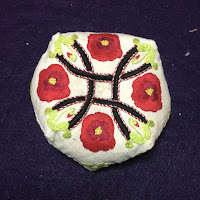
I've got pictures of the finished embroidering and assembling of the biscornu. Sewing the biscornu together went so fast it was amazing.
 I finished embroidering the poppy buds first. I used stem stitch for the flower stalk. The green on the bud is back stitch for the outline. The red tip has a fly stitch for the outline and are filled with a couple satin stitches. The large poppies I outlined with a couched thread. I find it faster to make curved lines this way as there are fewer small stitches. The center is a circle of french knots with green satin stitches filling in the middle. The flower is finished by filling in the petals with satin stitch.
To assemble the biscornu fold the seam allowance under and pin all the way around. Line the pieces up so the edges are in the middle. Sew the two pieces together half way across. Fold the fabric around the corner and keep working around this way. Stop at the last side and fill with the stuffing.
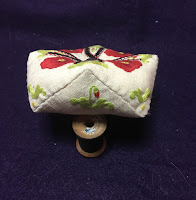
Use a dense filling and stuff it in tight making sure that it gets into the corners. Finish off the seam around. Then sew a button on the front through one on the back to hold the whole thing together. I included a picture of it propped up to show how the design looks on the side.


No comments:
Post a Comment