Tuesday, 11 July 2017

Summer Shorts

Embroidered Shorts
I wanted to get some shorts fixed up for summer. I picked these because they looked a little plain when I got them and were missing the string in the center. I found a bright blue string for them and designed a small motif to make for top left corner. I wanted something that looked lacy and matched the string.

Hand drawn shorts with both corner motifsI drew a few different designs and decided on a swirly pattern with small flowers between them. I made a copy of that and flipped it around to place in the bottom right corner to add some more decoration to the bottom of the shorts.
Coloured MotifCopying Motif
Stem Stitch swirlsI coloured in the drawing and made the center of the flowers to match the  blue string. I copied the design again and cut off the edges right up to the swirls. It can be hard to copy designs onto denim because it is so thick and dark. I used a black fine line marker which is a little risky cause any errors have to be covered. I drew around the edges and then redrew the rest on the shorts using the edges for guidelines.

I started by working the lines of the swirls with a stem stitch to make them look more rounded and curly.
Split Stitch OutlineSatin Stitch flowers
I made the center of the flowers with Satin Stitch. Each of the flower petals was outlined in Split Stitch then Satin Stitched over top. The split stitch outline raises the Satin Stitches and helps define the edge.
Finished MotifThe picots were added last each one is an Open Chain Stitch which easily followed the swirly lines. The Stem Stitch swirls and the flowers were done right away. The picots took a little longer than I would have liked. Overall the embroidery made the shorts a lot more interesting to look at and gave them a more delicate look. 


Saturday, 24 June 2017

Finished Sampler

We are into summer now and the planting season is pretty much over. I have the planting sampler finished for now.

The wheel of the wheelbarrow was done in chain stitch. The inside of the wheel was a buttonhole stitch wheel to make them look like spokes inside.  The rest of the wheelbarrow is worked in outline stitch and stem stitch.

The pea is done with the same stitches that I used in the crewel embroidery piece. It was adjusted a bit to make it a little smaller.


I think that the spinach was my favourite of the seed packages in the end. The leaves were done in outline stitch and the veins in the leaves were done in stem stitch.


The piece on the left is the final Jacobean style piece for lesson two of the crewel embroidery course. I was going to post it before but after I mailed it off. I deleted the picture off of my camera. Then had to wait till it got mailed back before I could take another picture.

The large white flower petals are done in Cretan Stitch and then are outlined in a double running stitch. The red and yellow patch at the center of the flower is also Cretan stitch and so is the dark section on the large leaves at the bottom. The green leaves above the flower are worked in a striped buttonhole stitch. The smaller dark green leaf is buttonhole stitch as well. The stem was done in a twisted chain stitch. The tendrils were worked in the coral knot. Double running stitch is also used for the orange striped section of the flower. The fly stitch was used for the center light green in the large leaves and for the yellow and orange v's in the flower. Below the v's is a row of magic chain stitch in red and white. The three scalloped rows below that are done in buttonhole stitch.  

Tuesday, 16 May 2017

Crewelwork Dragonfly and Butterfly

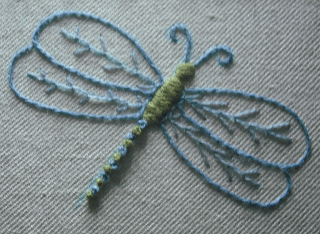
Embroidered Dragonfly
With summer coming soon the insects are flying by again. Many of the bugs are very beautiful when looked at closely. They are a popular subject in embroidery. Many books have been written just about designs and techniques used to recreate the look of these fascinating creatures. Quite a few artists worked almost solely on this subject.
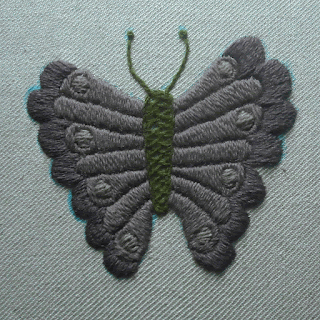
Embroidered Butterfly

The Dragonfly is made with Appleton's Crewel wool light Olive Green and two shades of Marine Blue. The body and the antenna of the butterfly are a Dark Olive green. The wings are two shades of Mauve and a Dull rose pink for the spots. I used these pieces as the motifs for the sampler in the third lesson of the Crewel Embroidery Course.

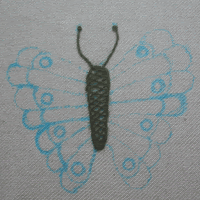
The body of the butterfly is worked first in herringbone stitch then surrounded in outline stitch. Then the antenna were added in split stitch with a french knot on each end.

Butterfly Wings Split StitchButterfly Body Herringbone Stitch
Butterfly wingtips Satin Stitch
For the wings on the butterfly I split stitched around each segment. Then satin stitched over top. The spots where worked first so that I could keep a more uniform shape when I stitched around them. The light Mauve is workup up and down and the darker wing tips are worked side to side.

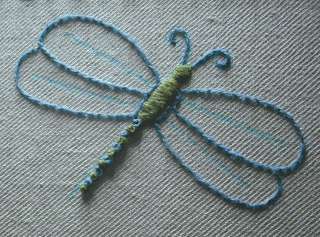
Dragonfly Body Satin StitchThe body of the Dragonfly is made the same as the wing segments in the butterfly.
By split stitching around and doing the satin stitch over top.

Dragonfly Wings Split StitchDragonfly tail French KnotThe tail is a row of French Knots made with two strands of wool to make the knots larger. The antenna and the outline of the wings are made in split stitch. The veins of the wings are worked in Feather Stitch. Starting from just inside the outer edge of the wing towards the body.

Monday, 1 May 2017

Planting Sampler


I’ve been planning my garden and this planting sampler for a few weeks now. I used some of the spring vegetables that I worked earlier in the year. 
I wanted to focus on supplies I would be using in the spring like tools and seeds. 

I drew many different garden tools and a few different styles of seed packages. I cut all the pieces out into blocks and placed them around until I came up with a design that worked. I had more pieces than in the picture many of them didn’t get chosen for this project. I practiced drawing it out a couple times experimenting with different tools and styles of seed packages. Once I settled on where to place all the pieces. I drew it out on the fabric with a water soluble marker pen.

I was unsure which stitches to use to embroider it so I decided to stitch up a monochromatic outline. Working the design in monochrome first helps to see flaws left in the design. I started with areas that I was sure on how I wanted to work them. This gives me longer to think about how to lay out the stitches in other sections. I used outline stitch for most of the fine lines and started with the seed packages. I’ve seen Chain Stitch used for making small block style letters before and wanted to try it out here. 


The shovel and fork I did next with a combination of the outline and the stem stitch. I used different numbers of strands to make the lines thicker or thinner. I started working on the vegetables next. Most of them were quick to work because I had tried them before. I wasn’t going to get all the vegetables finished in time to write the blog. So I stopped after making two rows of fly stitch to embellish the seed packages on the bottom row. 


I will post a picture of this piece once it is finished. I want to make a final version later that will be done in color. I am just picking out colors now as I finish the blue version off. Afterwards the design will be made into a pattern.

I have finished a pattern for the turtle and I am offering free samples in hopes of getting some feedback. The pattern is small and fast to complete if you are interested in one email me at abrownsdesigns@gmail.com and I will send you a copy. The pattern can be viewed on a computer or printed out.  

Monday, 17 April 2017

Easter Egg Sampler

This sampler is made in the shape of an egg to resemble a decorated Easter egg. This is a simple classic pattern that is a great way to learn and practice new stitches. The egg is about 2 and half by 3 and half inches. I outlined the egg shape with the stem stitch first. Then I started in the center with a medium border stitch. I used the Guilloche Stitch which is a combination stitch. Either side is outlined with the stem stitch. Between them rows of straight stitches are evenly spaced. Threads are laced under the straight stitches making a looped edge on either side. Last a French knot is placed between the rows of straight stitches in the center.

The next rows are made one above and the same row below. This way the top and the bottom of the egg will look the same. The second row is an isolated stitch the reverse fly stitch. It is made by putting one fly stitches facing towards the center then another on top facing the outer edge. It is important to make each stitch the same and mark them out so they will be evenly spaced.

The third row is a line stitch called the feathered chain stitch. It is made of long tail chain stitches leaning towards each other in a zigzag pattern. I tried the first line without marking it out but it looks much better when the stitches were measured out first.
The fourth row is an isolated stitch the cross and twist stitch. It starts with a cross stitch with a knotted stitch on top.
There was plenty of room on the bottom for another row but I was running out of room on top. So I used a row of small simple French knot stitches for the final row. This one is all in purple I would like to try a few more in a combination of light Easter colors.

Sunday, 2 April 2017

Daffodil Brooch

Embroidered Daffodil
I saw a flower brooch in a magazine done in machine embroidery. I wanted to try making one in hand embroidery. The brooch is about 3 inches across and took about eight hours to make. The inside of the flower went fairly quickly. It took quite awhile to do the edging. I used cotton embroidery cotton, thick metallic thread, a fine weave cotton cloth, a piece of felt, and a brass pin.


I adapted a picture of a stylized flower that I found online. I sketched one out then traced it on to the fabric with a water soluble marker pen. I had to adapt the picture a little more as I went along.

Daffodil SketchSketch Water Soluable

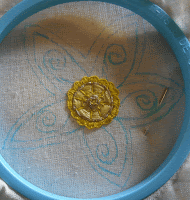
I started in the center with a small satin stitch circle. I used the brightest orange color that I had picked out. Next I outlined it with the metallic thread. I couched the metallic thread on with the bright orange thread. I went around the center three times.

Satin Stitch CenterCenter Goldwork

I did the next round in Satin Stitch. After looking at a book about Chinese embroidery I decided to divide the center into pie shapes and fill in each one.

Pie shaped Satin StitchSatin Stitch Circle

 I built the design up more by making small loops around the center with the open chain stitch in the orange color. It helps to add several layers of stitches to thicken the piece so it will hold it's shape later when pinned on. Then I put a straight stitch in orange between each piece of the pie shape. This covered up the seam left between the pieces. I put another row of couched gold thread around the edge.

Open Chain Stitch LoopsGold Center Outline


I went around the center one more time with a row of buttonhole scallops. These are what really made it look like a daffodil. I made these in the same bright yellow color that I used on the edge. The petals were done after in long slanting stitches in a lighter yellow color.

Buttonhole ScallopsSlanted Satin Petals


I couched down swirls made with the metallic thread. While I was couching the lines down I held the swirls in place with the needle. These held down the Slanting Satin Stitches since they are so long. They also help hold the petals out and when it's finished can be used to bend and shape them a little.


At this point I pinned the embroidery to a piece of felt so that the edging would hold the two layers together. I carefully cut out the flower a little bit at a time before working the edges. I stayed a little ways ahead of myself so I had room to move the needle from one side to the other.


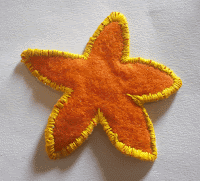
I did the edging in a buttonhole stitch so that the top line of the stitch made an outline for the Satin Stitches and wrapped all the way around the edge. I cut off pieces while going around as they got in the way. The felt back was nicely edged and I added a brass pin afterwards.